Friday, December 3, 2010

I went with 'one of everything'


The nice thing about getting around to my second Thanksgiving-related post a bit later than planned is that we can pretend I'm just very early in reporting some good ideas for Christmas desserts. All were met with eager forks, so any will do. And my conundrum over which dessert to bake for Thanksgiving was solved by being invited to three meals in one day. Of course, I didn't think twice about accepting every invitation — what's not to love about more friends and food on a holiday?


The sugar jar at the end of a morning of baking.


I was freed from work on Wednesday generously early, which gave me time to go to the grocery store for last-minute ingredients. In these days of sunset before 6 p.m., making a pie dough at home on a weekday with sun streaming in the kitchen windows was a delight. Holiday good feeling No. 1!


I also made cookie dough to inaugurate my brand-new KitchenAid mixer yowza! because it was a gift from Miguel and he requested that it produce chocolate chip cookies. It's pistachio!


For some reason, making two doughs — one of them not even Thanksgiving-y — seemed like adequate prep for the evening, so we met up with buddies for pizza and drinks until the wee hours. Then a few wee hours later, I was up and baking.


Meal No. 1

My parents' house


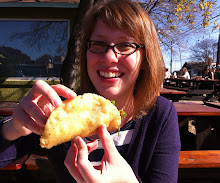
I made this chocolate pecan pie with this, another deal I grabbed during my Williams-Sonoma tenure. I'd considered adding bourbon but after tasting it, I thought it needed nothing more than my chocolate addition. Miguel made a pumpkin pie that was a huge hit — my parents, neither of them big pumpkin pie eaters, said they'd conferred about having a taste to be polite but then gobbled it down in a way that wasn't polite so much as complimentary.


This get-together was notable for being the only one of the day with turkey and children.


Meal No. 2

Lucy's house


Later in the afternoon, we went to a potluck with friends plus some of Lucy's family from New York. We ate her amazing ginger-jalapeno-orange-cranberry sauce and admired Caitlin's table decoration of sprigs of green leaves and berries collected on her walk over, and Lucy introduced me to her dad by saying that if I were an action figure, my prop would be a baked good. I reinforced the stereotype with a cranberry upside down cake.


Meal No. 3

The Treviños' house


I was stuffed at this point. There was no reason to continue eating. Except that this dinner was cooked by two culinary students, my buddy Javi and his classmate. (Bradley? I should remember. He was cool.) I stood in the kitchen doorway to watch them cook in a way that's very different from my own: they unflinchingly use very high heat and toss about professional kitchen warning lingo like "Sharp across" when moving a blade stacked with chopped bits from one counter to another. Javi cooked an elaborate shrimp bisque from notes taken during class, and Bradley later explained the historical usage of the word "bisque." This made me thankful to be in the midst of the type of friends who would have such a conversation. I love it when people unabashedly nerd it up, whatever their interest.


I made a French apple cake that is so easy but turns out looking so fancy and comes out of the oven with a super-concentrated apple flavor. Considering that and the fact that it's so much fruit and so little batter, a better name for it would be Apples in Cake Configuration.


What did you eat for Thanksgiving?


French Apple Cake

Adapted by David Lebovitz from Around My French Table by Dorie Greenspan


3/4 cup flour
3/4 tsp. baking powder
pinch of salt
4 large apples (a mix of varieties)
2 large eggs at room temperature
3/4 cup sugar
3 Tbsp. dark rum
1/2 tsp. vanilla extract
1 stick of butter, salted or unsalted, melted and cooled to room temperature


Preheat the oven to 350ºF and adjust the oven rack to the center of the oven.

Heavily butter an 8- or 9-inch springform pan and place it on a baking sheet.

In a small bowl, whisk together the flour, baking powder and salt.

Peel and core the apples, then dice them into 1-inch chunks or slices of the same width.

In a large bowl, beat the eggs until foamy, then whisk in the sugar, then rum and vanilla. Whisk in half of the flour mixture, then gently stir in half of the melted butter

Stir in the remaining flour mixture, then the rest of the butter.

Fold in the apple pieces until they’re well-coated with the batter and scrape them into the prepared cake pan and smooth the top a little with a spatula.

Bake the cake for 50 minute to 1 hour, or until a knife inserted into the center comes out clean. Let the cake cool for 5 minutes, then run a knife around the edge to loosen the cake from the pan and carefully remove the sides of the cake pan, making sure no apples are stuck to it.


Storage: The cake will keep for up to three days covered. Since the top is very moist, it’s best to store it under a cake dome or overturned bowl.


Wednesday, November 24, 2010

Dessert in a skillet


Mmm, apples. We're off to a good start.


After a holiday potluck at work last week and an early celebration of Thanksgiving this weekend with Miguel's family, I feel more prepared, cooking-wise, for this Thursday with my family. Get this: I learned how to make gravy! I'm sure someone in my family already plans to take care of this step, as — somehow! — it's always been handled without my help in years past. But if needed in a pinch, I can toast up that flour and whisk in the drippings like a pro. At least, I feel as though I could after watching over the shoulder of Miguel's sister's mother-in-law, who gave her tutorial in Spanish. Another lesson: I now know the Spanish word for "lumps."


Juicy, sliced apples on a stove top? You bet!


There's no way you can go wrong with a flaky crust, right?


I'm also a little more wise about attempting slightly ambitious desserts for such a well-attended occasion. Let's just say it's a good thing that other people brought multiple pies and cakes and fluffy marshmallow concoctions. My tarte Tatin, though intended to be an effortlessly glamorous French take on a traditional apple pie, was not only under-caramelized but also mushy and even a tad green. I blame that one weirdly hued corner on an unripe Golden Delicious.


I'm tempted not to publish such things and save myself from further embarrassment. But I feel a little better being able to point out that it tasted fine — but probably not as good as the one Dorie Greenspan baked in Michele Norris' kitchen — and that one of Miguel's cousins said it was one of his favorites. I guess this is the inherent trouble with upside-down desserts. I think if I try this recipe again, I'll do the caramelizing first and wait until the sugar has become dark before adding in the apple layer.


Oh, my. Hey, the chocolate cake is looking good...


But that tart was only one of many desserts I'll make this week. I am undeterred. The only thing is, I have so many family/favorite/brand-new-favorite-blog recipes I want to cook up for Thanksgiving, I haven't even been able to decide yet what I'll be making. One of everything??


Friday, November 5, 2010

Ersatz but tasty


My knowledge of Indian cooking doesn't extend too far. I know that it's often heavily spiced and includes what I think of as relief dishes, things like raita and kheer that are cucumber-cooled or sweetly creamy.


It's this contrast that makes me love it, so I figured that's all I needed to know to wing it with Indian spices. I had on hand okra from a friend's garden and a sweet potato that had been lying in wait and I figured I could combine the spicy and sweet in one dish. I had no real plan but I didn't see much chance for failure in roasting vegetables with salt, pepper and some lively spices and serving them over slightly sweetened rice. Whatever the result, I'd eat it and enjoy it knowing that authenticity was not the aim.


And though it didn't end up being as spicy as, say, some curries I've had, a jalapeno (shared from a colleague's garden — I'm a pro at freeloading, it seems) did get the heat going. In fact, I'm typing with one hand right now so I can continue stuffing grapes into my mouth to cool it down. I'm including my recipe here because, hey, look! I made a recipe! And that's what blogs are for. But if you find yourself with random roastable vegetables, rice and garam masala, you'd do well to throw them together any old way without poring over these instructions because that's all I did in the first place.


Boy, reading over this, it occurs to me that I could rename this blog The Diffident Chef. Or how about Eeyore Cooks? Okay, the self-effacing ends here: get out your half teaspoons and don't dare to skip the anise stars — this recipe is perfection!


Really, it was quite good.


Roasted okra and sweet potatoes spiced at random


5 okra pods, cut into half-inch lengths

1 large sweet potato, cubed

olive oil

salt

pepper

1/2 teaspoon turmeric

1/2 teaspoon garam masala

1/2 teaspoon cayenne

1 jalapeno pepper, diced and partially seeded

2 garlic cloves, diced

1 cup chicken broth

1/2 cup water

2 anise stars

1 bay leaf

1 cup rice

sprinkling of cinnamon

drizzle of honey


Preheat the oven to 400 degrees and put in a foil-lined baking sheet. Collect the okra and sweet potato bits in a bowl and drizzle them with a quantity of olive oil appropriate for roasting. Sprinkle with salt, pepper and the spices and mix it all up with your hand. (Wash up quickly thereafter or you will be yellowed by turmeric.) Toss in the jalapeno and garlic. Take the preheated sheet from the oven and scatter the vegetables onto it. (The hot pan will start them cooking right away, making roasting faster.) Set a timer for about 20 minutes and turn the vegetables halfway through.


Meanwhile, combine the chicken broth, water, anise and bay leaf in a small pot and bring to a boil. When it gets going, add the rice and cook for 15 minutes. Near the end of the cooking time, remove the stars and leaf and stir in the cinnamon and honey. Ideally, what's in the oven and on the stove top will finish cooking at the same time, ready for you to pile it together onto a plate.

Thursday, September 30, 2010

Très chic tres leches cupcakes


If worrying about a deadline counted for something, I'd have aced all my papers in college and I'd receive piles of fan mail for the stories I write for work. Unfortunately, though in this modern day I don't see why, getting things done is still the only way a deadline will happily slide by and let you get on with what it is you want to be doing. Also unfortunately, doing the stuff I wanna do when I'm supposed to be productive remains one of my rebellious pleasures.

When else is rearranging all the books on your shelf or trimming your bangs as much devious fun?


Today, I'm lounging at home and satisfying my need to do something pointless when I shouldn't by showing you pictures of cupcakes I made. Miguel took these pictures with the Hipstamatic app on his phone so that we can better long for the good ol' days of when these cupcakes were in front of us. They're tres leches cupcakes, which I know translates to "three milks" in Spanish but in a half-French sort of way I believe should mean "VERY SUGARY."

I made them using a
Pioneer Woman recipe that I baked in a muffin tin instead of a 9x13-inch pan as she calls for. The main thing to know if you're making this dessert as cupcakes is to use foil liners. This helps you avoid a sticky mess but also turns out being a nice little container that you can eat the sweetened spongecake from with a spoon.


Tres leches cupcakes
Adapted from
Pioneer Woman

For the cake:
1 cup all-purpose flour
1-½ tsp. baking powder
¼ tsp. salt
5 whole eggs
1 cup sugar, divided
1 tsp. vanilla
⅓ cups milk
1 can evaporated milk
1 can sweetened condensed milk
¼ cups heavy cream

For the topping:
1 pint heavy cream, for whipping
3 Tbsp. sugar

Preheat oven to 350 degrees. Spray muffin tin lined with foil liners.
Combine flour, baking powder and salt in a large bowl. Separate eggs.
Beat egg yolks with 3/4 cup sugar on high speed until yolks are pale yellow. Stir in milk and vanilla. Pour egg yolk mixture over the flour mixture and stir very gently until combined.
Beat egg whites on high speed until soft peaks form. With the mixer on, pour in remaining 1/4 cup sugar and beat until egg whites are stiff but not dry.
Fold egg white mixture into the batter very gently until just combined. Pour into prepared cups.
Bake for 20 to 25 minutes or until a toothpick comes out clean. Let it cool.
Combine condensed milk, evaporated milk and heavy cream. When the cupcakes are cool, pierce each one several times with a fork. Spoon the milk mixture onto each little cake.
Allow the cupcakes to absorb the milk mixture in the refrigerator for 30 minutes or until whenever you're ready to serve them.
Whip 1 pint heavy cream with 3 Tbsp. of sugar until thick and spreadable and dollop onto each cupcake.
Slice one strawberry for each cupcake without cutting them all the way through the stem end. Fan the slices out so that they look magnificently fancy but you know all it took was a few seconds with a knife. Plop a strawberry stem-end down onto the whipped cream.

Friday, September 24, 2010

cookie success!


I made chocolate chip cookies today, and just as I got to the step of adding brown sugar to the butter and white sugar, it became clear that the brown sugar I had would not be cooperating. It had been at the bottom shelf of the refrigerator for a while, a storage solution I'd thought was pretty clever. You can keep flour fresh for longer in the fridge — why not brown sugar?


Because it turns rock hard, that's why. Which sometimes happens with this stuff. But this was incredibly, unrecoverably dry. There was none of the usual feeling of moist sand just revealed by a receding wave — this was more like the dry sand further from the water that gets picked up by the wind and blown into your eyes. And for spite, it won't work in your cookies either.


A rock-hard rock of brown sugar


So Miguel hopped on his bike and rode to Farm to Market, a place down the street that's great for those times you need one lemon and some lettuce to round out your dinner ingredients. Actually, it's better for more than that and probably deserves more of my grocery dollars, and you can probably tell I feel a little guilty about not supporting this local place more. But it sure is convenient when you need a lemon.


Potential Cookie Disaster No. 2 happened when Miguel got back home. After his first bike ride post-Lasik surgery, he was invigorated and full of feeling — and also full of comments like, "I rode slower so I could really look at everything around me!" and "That girl across the street has freckles!" But the new package of brown sugar was no softer than the first.


I've always read that the way to combat this is a few seconds in the microwave. We don't have one of those, but two minutes in my small convection oven and some energetic carving with a spoon got me the cup I needed.


The secret ingredient: espresso powder


Even with the sugar problem solved, I kept worrying about the cookie dough through Potential Cookie Disasters Nos. 3 through 7:


3) Before adding flour, the dough almost broke, the way a frosting can.

4) It tasted pretty darn salty.

5) It was runnier and more like a batter than a cookie dough should be.

6) Spooning it on the cookie sheet, I saw that some big brown sugar clumps remained.

7) I forgot the chilling step.


These cookies must be miraculous though, because they withstood seven potential disasters and came out not too salty, not too crumbly, but just right. The proof: a minute ago, Miguel's dad called out from the kitchen with a full mouth, "You got a winner here, Beth!"


Disaster-proof chocolate chip cookies

Adapted from The Pioneer Woman


2 sticks butter, softened

1 cup firmly packed brown sugar

½ cup white sugar

2 whole eggs

2 teaspoons vanilla extract

2-¼ cups plus 2 tablespoons all-purpose flour

1 teaspoon (heaping) instant espresso granules

1 teaspoon baking soda

1-½ teaspoon salt

1 bag semisweet chocolate chips

Handful of pecan pieces


Preheat oven to 375 degrees.


In a bowl, beat together butter, brown sugar and white sugar until combined. Add eggs and vanilla and beat together.


In a separate bowl, stir together flour, instant espresso, baking soda and salt. Add to wet ingredients in batches, stirring gently after each addition.


Stir in chocolate chips and pecan pieces.


Press plastic wrap against the dough and chill in the refrigerator for 30 minutes.


Drop balls of dough on a cookie sheet and bake for 11 to 13 minutes. Let cool for a minute on a baking rack, but not for too long: they're best enjoyed warm.

Monday, September 20, 2010

vacation and catching up


Not long ago, I told someone that I keep this blog and update it "very periodically." What I meant was "only infrequently," so apparently I'm not always a good blogger or a good word user. But not to fear — things are in the works! Meanwhile, here's a photo of a jolly brunch in California over Labor Day weekend.


This meal was significant for its obvious good times with good, Jon Stewart-quoting company but also because it's the last time I ate Sabra hummus, something that tastes so creamy and flavorful, you wouldn't guess it's made with only about three ingredients. For some reason, I'd taken note of this small mention of it by someone who makes everything from scratch but casts it as something so good it's worth buying readymade. And she was right! But sadly, as far as I can tell, this brand isn't sold anywhere in Austin.

So, what the heck, how about more vacation photos? I was in Malibu, where I was barefoot most of the time and took my first-ever nap in a hammock.


I also kayaked for the first time.


That's me paddling toward the horizon. Photo by my lovely friend Rebecca.


And jumped around with glee!


And because this is a food blog, we'll play catch-up with some tasty things I cooked but probably, if we're being honest, won't find time to write about. So here are two Smitten Kitchen recipes I made and loved.


This is a zucchini side I adapted and ate over pasta to make it more of a full dinner. I think having the vegetable and the pasta cut into roughly the same shape makes for good eating.


And here's a meal that lead to a detailed text message conversation from the grocery store on pancetta vs. prosciutto when I couldn't find what the recipe called for.


I totally recommend both!


Thursday, July 15, 2010

so square


It's so easy to find gifts for friends — the people with whom I have so much in common. It's a pretty safe bet that they'll like the same stuff I like. It's almost a good thing I'm not more well-to-do. If I were, my splurges likely would just junk up my friends' houses with pretty Anthropologie miscellany that nobody really needs but I feel for that moment in the store that they shouldn't live without.

And Dana would own every cute oven mitt that crossed my path. Because remembering that time she had no oven mitt and no choice but to wad up her T-shirt to take cookies out of the oven in our dorm kitchen never stops being funny.

Not to sound like a terrible person, but in a certain selfish way, this gift-picking ease is also kind of a bummer. I had one lovely evening of melting chocolate and cooking caramel with the
Baked cookbook before it was wrapped up as a birthday gift and made its exit from my kitchen. Melissa, I will have to come to your house to visit it and gaze at its pictures. Expect for me to do this often. But you'll be there, and you do have a kitchen. So really, maybe it's not such a bummer! I've read that the Sweet & Salty Cake and all its elements are an all-day affair. Get ready.


Getting there. The sugar boils furiously but likes to stay right at about 200 degrees for a long time.


Finally, the soft ball stage!

After my first-ever caipirinha pre-birthday, I came home and made the book's Peanut Butter Crispy Bars to bring to the next night's birthday dinner. I chose it because it wouldn't require a late night of baking (so maybe not the best representation of a book called Baked's contents?), and the bars turned out deliciously. I have to say, I'm most proud of the precise, Deb-worthy corners on these little squares.


Hey, look — turns out she's made them, too!

My only reservation about this recipe is that the bars were unmitigatedly sweet without enough of that contrast you usually get with peanut butter and chocolate. But this could be because I was accidentally heavy-handed with the chocolate that goes in the PB layer. Still, it could benefit from some salt. Maybe flakes sprinkled on top? Or what if you added salted peanuts to the crisp bottom layer? Yum. Melissa, don't be surprised when I come over with candy thermometer in hand.


Peanut Butter Crispy Bars

From Baked: New Frontiers in Baking


For the crispy crust


1 3/4 cups crisped rice cereal

1/4 cup sugar

3 Tbsp. light corn syrup

3 Tbsp. unsalted butter, melted


For the milk chocolate peanut butter layer


5 ounces milk chocolate

1 cup creamy peanut butter


For the chocolate icing


3 ounces dark chocolate (60 to 72 percent cocoa)

1/2 tsp. light corn syrup

1/2 stick unsalted butter


Make the crispy crust: Lightly spray a paper towel with nonstick cooking spray and use it to rub the bottom and sides of an 8-inch square baking pan.


Put the cereal in a large bowl and set aside.


Pour 1/4 cup water into a small saucepan. Gently add the sugar and corn syrup (do not let any sugar or syrup get on the sides of the pan) and use a small wooden spoon to stir the mixture until just combined. Put a candy thermometer in the saucepan. Cook over medium-high heat and bring to a boil; cook until the mixture reaches the soft ball stage, 235 degrees F.


Remove from the heat, stir in the butter and pour the mixture over the cereal. Working quickly, stir until the cereal is thoroughly coated, then pour it into the prepared pan. Using your hands, press the mixture into the bottom of the pan (do not press up the sides). Let the crust cool to room temperature while you make the next layer.


Make the milk chocolate peanut butter layer: In a large nonreactive metal bowl, stir together the chocolate and the peanut butter. Set the bowl over a saucepan of simmering water and cook, stirring with a rubber spatula, until the mixture is smooth. Remove the bowl from the pan and stir for about 30 seconds to cool slightly. Pour the mixture over the cooled crust. Put the pan in the refrigerator for one hour, or until the top layer hardens.


Make the chocolate icing: In a large nonreactive metal bowl, combine the chocolate, corn syrup and butter.


Set the bowl over a saucepan of simmering water and cook, stirring with a rubber spatula, until the mixture is completely smooth. Remove the bowl from the pan and stir for 30 seconds to cool slightly. Pour the mixture over the chilled milk chocolate peanut butter layer and spread into an even layer. Put the pan into the refrigerator for 1 hour, or until the topping hardens.


Cut into squares and serve. The bars can be stored in the refrigerator, covered tightly, for up to 4 days.